Stop embarrassing yourself when you give presentations
As I wrap up a semester of teaching a third year university class and I prepare to present at the American Association of Geographers conference next week, I’ve been thinking about presentations, presentations, presentations. We’ve all seen it, or perhaps been there ourselves: The previously well-composed presenter now desperately trying to wake their computer up so we can move to the next slide, or scrambling to close embarrassing browser tabs and email messages only to then fish through a slew of personal files to locate the presentation file. It’s unpleasant to experience this from either side of the podium. It can disrupt the flow of our presentation, undo the polished public persona we work hard to cultivate, or reveal information we might prefer kept private. I have seen veteran academics, part of whose job is to regularly give presentations, melt into an embarrassed and frustrated mess. This has always been surprising for me. It is the things we do on a regular basis in our jobs that we should have mastered, the kinks long-ago ironed out. For some reason when it comes to technology this seems not to be the case. The beautiful thing is you can stop embarrassing yourself when you make presentations with very little effort, and you’ll thank yourself every time you need to present. I will walk you through my setup for giving presentations without embarrassing technological gaffs. It’ll take you $0 and about 20 minutes to have yourself set up the same. The added bonus is that you’ll never have to fear for your security if you’re sharing your computer at conferences, too. In this post I guide you through the process of setting up a computer user account dedicated to giving presentations.
Create a new user account
We want to make a little presentation “silo”, a secure enclave sterilized of your personal information. We don’t want cutesy desktop wallpapers, sensitive email notifications, and personal information in this silo; it needs to be as generic as possible. This allows us to hand off our computer to fellow presenters knowing that they won’t be rooting around our personal files. It also means we can set up the account to try and prevent technical issues. The best way to do this is to create a new user account without administrative privileges. This is fairly straightforward in Mac OS X. This is a good time to make sure you have a password enabled for your own user account, and that your computer is not set to auto log-in. Make sure the password for your personal user account is strong too, because that’s just common sense. It is critically important that you have your personal user account well-protected. Your personal account is likely an administrative account, so you want to make sure that only you know the password to allow administration-level changes to your computer. This prevents anyone using the Presentation account from accessing your personal files and making changes to the software. You’ll want to password protect your dedicated presentation account so I do recommend a password, but make it easy. If you are sharing your computer with other presenters you want them to be able to troubleshoot their own problems, and allowing them to restart the machine and log back into the presentation account without bother you is important. An easy to communicate and remember password is helpful here.
Configure your new user account
Now you have a generic user account that cannot access any of your personal files or make changes to your system. Now we need to configure this account. It will be tailor-made for giving presentations and to make the process as smooth as possible for you or your guest presenter. 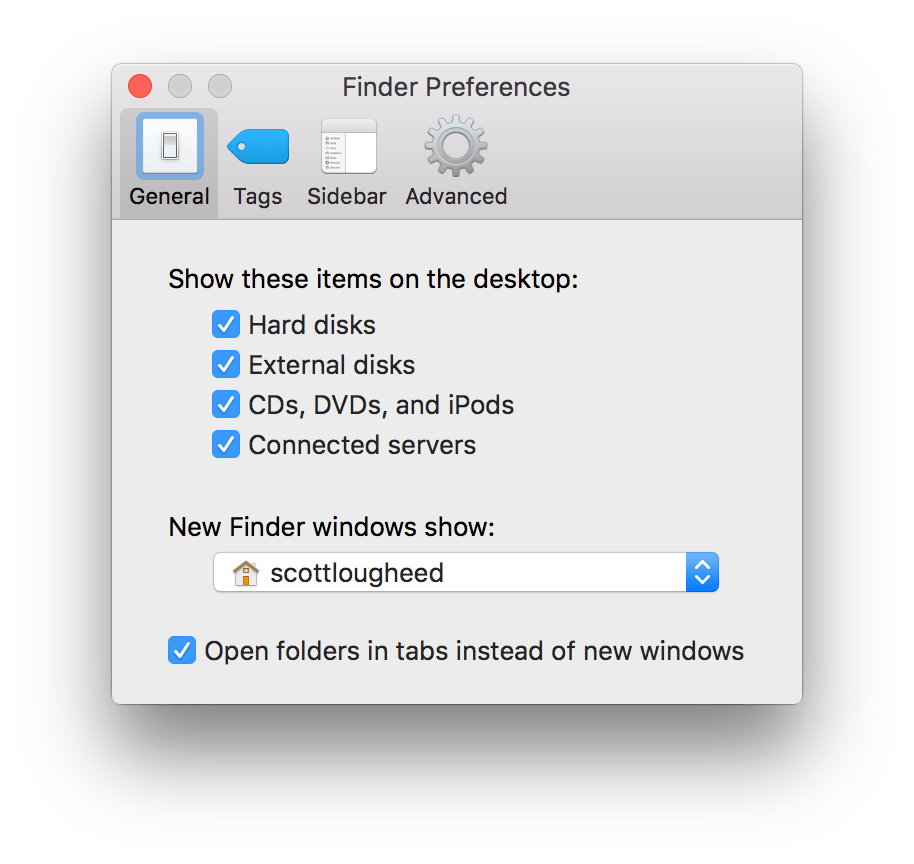
Make all the small tweaks
Since this is a vanilla user account, we’ll need to go in and tweak all the little OS X settings to our liking. I want to see my disk drives on the desktop, I want the sidebar text to be set to “small”, I want tap-to-click on my trackpad as well as two-finger-right-clicking. Take a moment and set things up to be comfortable. Most importantly: Make sure Finder is configured to show external drives on the desktop. If your guest presenter is loading a file from a thumb drive you want that drive to be dead-easy to find.
Don’t log into anything
This is key. No iCloud, no email, no iMessages, no Google, no anything. Don’t do it. Do not sync your contacts, calendars, bookmarks, nothing. You don’t need any of that in this account and you don’t want a co-presenter to be wading through that crap either. The one exception is Dropbox, and I’ll explain why below.
Clear the dock
Regardless of how you like it with your personal account, make the dock visible, and perhaps a little larger than you’d normally like it. Now remove everything from the dock except the essential presentation-giving items. My presentation dock looks like this:

You want to have only the essential tools at hand. You aren’t going to be checking your email on this user account, so why have Mail in the dock, right? You’ll notice that I’ve included System Preferences. I don’t normally have this in my dock on my main account, but here, it’s nice to have it immediately at hand should something go awry and you need to change a setting on the fly. ### Set your defaults {#set-your-defaults} I don’t have Flash installed on my computer and I use Safari as my default browser. Since Google Chrome has Flash built into the browser I keep it around just in case I encounter a site that, god help me, requires Flash. If I encounter a site in Safari, I just quickly switch to Chrome for that short while. Having Chrome as the default here means that if I click any links, I know they’ll open in a Flash-Friendly browser. But remember, you aren’t the only one using this Presentation account, and your guest presenters may not be as tech savvy as you. You also can’t anticipate what kind of content your guest presenters might be displaying. Having Chrome as the default ensures that if you or your guest presenter needs flash, you aren’t doing the browser-juggle just to get things right.
A little amphetamine goes a long way
Avoid having your display fall asleep in the middle of a presentation by installing a small and free utility called Amphetamine (Mac App Store link). This menu bar utility prevents your computer’s display from falling asleep regardless of what your system preferences settings are. In my presentation account I have Amphetamine set up to launch at log-in and to be enabled by default (I also use Amphetamine on my main user account but not in this way). This means you never have to think about your display settings when giving a presentation. As soon as you or your co-presenter logs into the presentation account, Amphetamine is enabled.
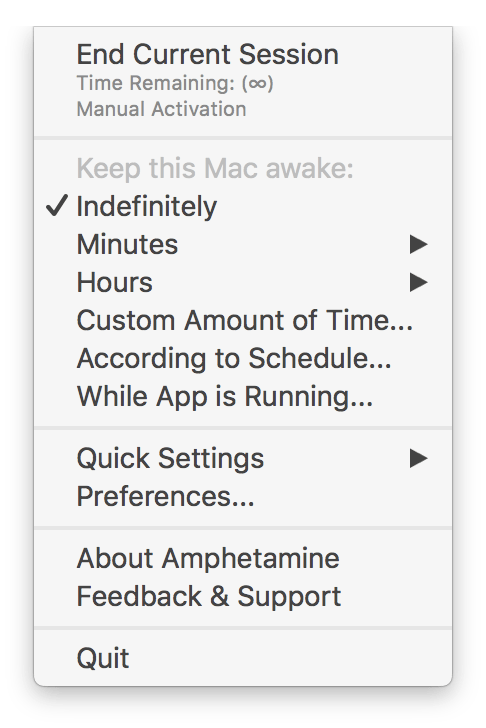
You can, of course, simply adjust the “Energy Saver” settings for this user account to set the display to “never sleep”, but I appreciate that Amphetamine offers a visual indicator of it’s current status. Another advantage is that, should I need to, I can make an adjustment a bit more easily compared to the Energy Saver settings. Also, since I run Amphetamine on my main user account (though in a much different way), I have it installed anyway, so why not use it?
Share only the right files, only the right way
You won’t be doing any actual presentation-building in the presentation account, in fact you’ll spend almost no time in this account aside from actually delivering the presentation! That means you’ll need a way of getting your presentations from your main user account to your presentation account. I have several mechanisms in place to facilitate this: Dropbox Selective Sync and /Users/Shared folder. They serve different purposes.
A dedicated sharing folder
In the /Users/Shared folder, I created a folder called “Presentations”. This /Shared folder is accessible to all user accounts on the computer, regardless of their administrative status. This means anything you put in where while logged into your main account is accessible to your Presentation account. In my presentation account I created a desktop shortcut to this folder too, again, to make things as obvious and accessible as possible for myself or anyone else who might be presenting from my computer. This system works very well in situations where I am emailed a presentation in advance from a co-presenter, or for when I do one-off presentations such as at conferences. Once the slides are finalized or received by email, while logged into my main user account I place a copy of the presentation in /Users/Shared/Presentations and I know it will be accessible from the Presentation user account. This folder is also only modifiable by an administrative user, which means that in order to delete or add a file when logged into the presentation account you’ll have to enter the admin user name and password. This protects against any guest presenters doing unwanted modifications to contents of this folder. Of course, the cloud is nearly ubiquitous these days, but we are setting things up to use a minimum number of logged-in accounts, so minimizing the number of services in use is ideal. Also, as we’ve all experienced, some venues can have little or no wireless internet access. We don’t want our system to be brought to its knees because it relied on an internet connection.
Dropbox
Dropbox is the only exception to the “Log Into Nothing” rule. Most of my work is stored in Dropbox, but only a small amount of that work is actual presentation files, so I don’t want all of it to be accessible to the presentation account, nor do I want it all duplicated on my hard drive. Since I give presentations in my course lectures every week, I don’t want to manually move files into and out of /Users/Shared/Presentations; doing so on a regular basis is error-prone and it can be a bit frustrating if last-minute course announcements need to be added to lecture slides. It is therefore ideal to be able to have lecture material live in only one place. To do this I set up Dropbox on the Presentation account to sync only the folder that contains those presentations, and nothing else. This prevents all that other Dropbox data from being accessible from your Presentation account and occupying space on your computer. This strategy is best for content that you will be accessing on a very regular basis and for long stretches of time. Courses are 4 months long and occur every week, so this is the ideal situation to set up selective sync for that content rather than moving one or more lecture presentations into and out of /Users/Shared/Presentation multiple times a week.
Thumb Drives
This is, of course, the easiest. On presentation day, your co-presenters can just plug a thumb drive in and be ready to rock and roll. You’ve already indicated in the Finder’s preferences that external drives should show up on the desktop so there should be no difficulty in locating the file! ### Open everything for the first time In order to ensure a nice smooth presentation, you’ll want to take a moment right now to open every application that you expect might be used: your web browsers, your presentation software, insert a thumb drive, and so on. Just take each program for a spin. If you will be on an institutional wireless network such as the one at your university, be prepared to re-login to that with this new user account (remember, no iCloud Keychain to pass along your credentials!). By going through this process now instead of on presentation day, you’ll deal with all those one-time-only first-launch dialogue boxes that all applications inevitably display. You may also find you need to re-authorize your Office 365 credentials if you are using any Microsoft software. Better to do that now, rather than scrambling moments before you or a guest presents! ### Take advantage of Fast User Switching
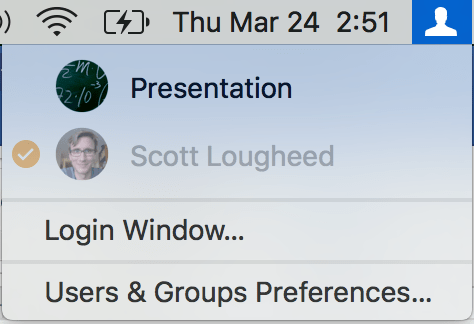
OS X offers the ability to have multiple users logged into the computer at one time. This means you can easily switch between your main user account and your presentation account without needing to close applications or log out (Though you might want to remember to close any file you plan to open on the other account!). ### A word about Windows {#a-word-about-windows} If you’re reading thing and work on a Windows machine, all of these principles are transferable, the steps may just be a bit different.
You’re now a presentation ninja
This seems like a rather daunting list of steps, but in reality you should be up and running in 20-30 minutes and you’ll never have to do it again. You can now enjoy your secure little presentation silo, free from embarrassing notifications and narcoleptic computer displays.